| This visual tutorial goes over the basic Vray render Settings you'll need to get started. You can download a preset of these render settings here. Unzip it and place the files in you Maya presets folder.
Vray Common tab
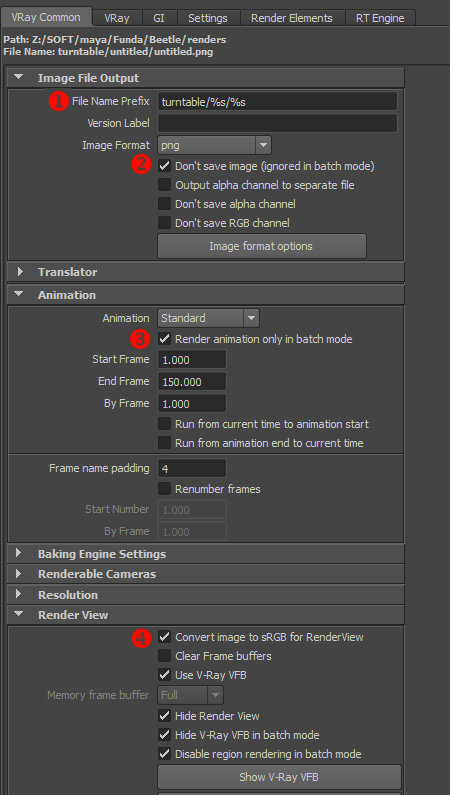
- File name prefex:The above code will create a folder named turntable, and another folder with the name of the Maya scene (%s is a variable for the Maya scene), and also use the Maya scene for the render name.
- Don't Save Image: Saves render time since our test renders will not be saved to disc.
- Render animation only in batch mode If unchecked Vray will render one image after another in the RenderView while you watch helplessly in despair.
- Convert to sRGB for RenderView: This is for linear lighting and will display our image in the Render View with a 2.2 gamma LUT.
Image format options
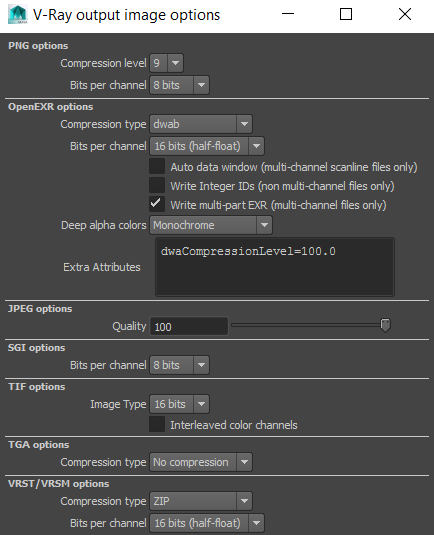
In the vray tab image options section (pictured above) click the "image format options" button to open the window pictured below. Note that "DWAB" has been selected for the exr compression type. Further an extra attribute can optionally be added to control the compression level. The default value is 45.0. Note these settings only apply when using the exr image format.
Vray tab
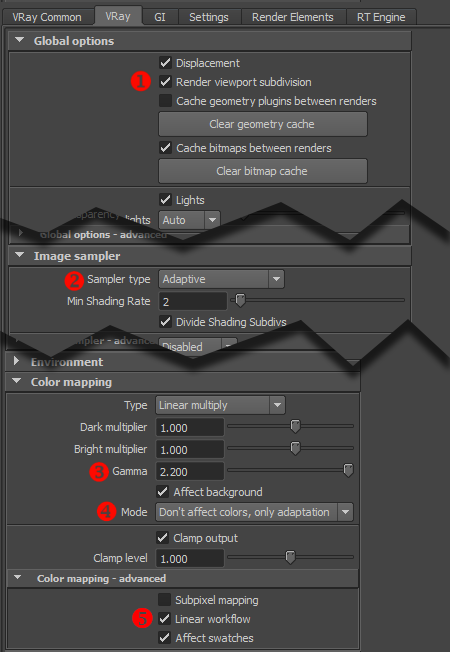
- Render viewport subdivision: Unless this is checked, Vray will not render subdivsion surfaces (smoothing with the "3" key).
Cache bitmaps between renders: Speeds up render time by keeping textures in cache, rather than loading them at render time. If new or modified textures are not loading, just click the "clear cache" button below this.
- Sampler type: Adaptive Vray defaults to "progressive" so we set this to adaptive instead. Note also the max subdivs should be set to 8, and threshold to 0.01
- Color mapping: This is the main place that linear lighting is setup. The gamma is set to 2.2 here.
- Mode: Set to "Don't affect colors, only adaptation"
- Linear workflow This automatically degammas textures based on their material input.
Affect swatches Similarly, this will degamma the diffuse color on a VrayMtl, if no texture map in connected.
Settings tab
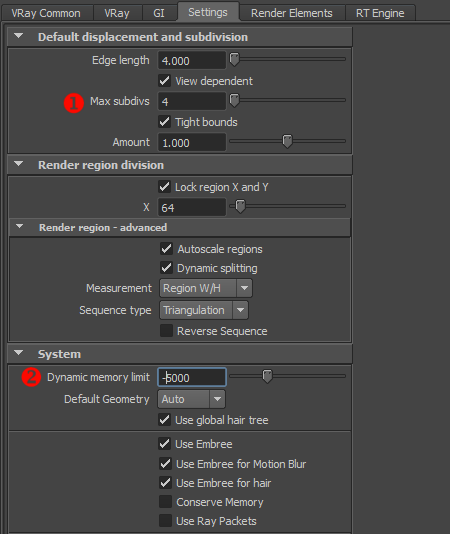
- Max subdivisions: This is set very high by default. Lowering it has a big impact on render speed.
- Dynamic memory limit Setting this to -5000 (a negative number) means it will reserve 5GB RAM (5000MB) and use the rest to render. On a machine with 32gigs of RAM that means it uses 27GB RAM.
Render Elements
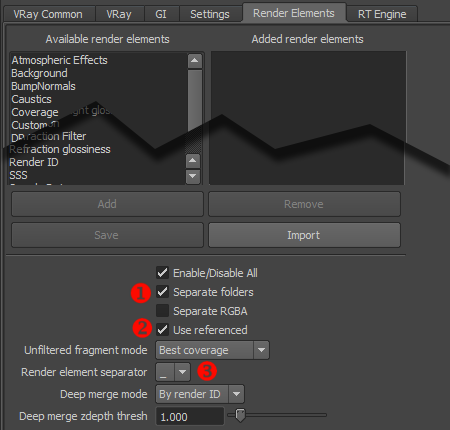
- Separate folders: ON creates seperate folders for each render pass.
- Use Referenced: ON Uses the render passes from referenced files (for example from a turntable template file)
- Render element separator We set this to an underscore (_) following our naming conventions.
Preset
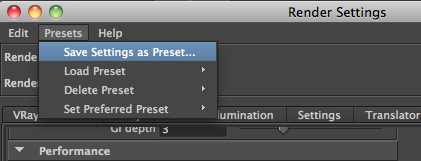
Once you're done you can save all of this as preset for easy access.
|